Paint correction is the controlled refinement of a vehicle’s painted surface to reduce or remove defects such as swirl marks, haze, oxidation, water spotting, and isolated scratches. It is performed with measured combinations of chemical polish, abrasive compound, machine movement, pad choice, and inspection—not with a single “magic” product. For a Metro Detroit daily driver, a black sports car, a work truck, or a dealership vehicle headed for delivery, the goal is to improve the finish while preserving as much usable clear coat as practical.
What Paint Correction Actually Changes
Modern automotive paint normally consists of a substrate, primer, color coat, and clear coat. The clear coat is the transparent upper layer that provides gloss and some resistance to weathering and chemical exposure. Correction work operates primarily within that upper layer. A polishing system levels or refines the area around a defect so light reflects more evenly instead of scattering across a gouge, scratch, or textured mark.
That distinction matters. A detailer is not “filling in” every imperfection with shine. A durable correction removes or reduces material around a defect, while a glaze, wax, or temporary filler can hide some defects without changing their geometry. Refinish manufacturers such as PPG Refinish organize automotive refinishing information around paint systems, preparation, application, and technical support; the same basic discipline applies when deciding whether an existing finish can be refined or needs repainting.
Correction versus cleaning, polishing, and repainting
- Cleaning removes bonded or loose contamination from the surface. It can reveal the real condition but does not normally level a scratch.
- Polishing uses a fine abrasive system to refine light defects and increase clarity. In everyday detailing, people often use “polishing” and “correction” interchangeably.
- Paint correction is the broader process of assessing defects, selecting an appropriate cut-and-refine approach, and verifying the result under inspection lighting.
- Filling temporarily masks some micro-marring or shallow defects. The finish may look better until washing or solvent exposure removes the masking effect.
- Repainting replaces or rebuilds the damaged paint system. It is the appropriate path when the defect extends through the clear coat or the panel has corrosion, peeling, or substrate damage.
A correction appointment should therefore begin with a condition assessment rather than a promise of a fixed percentage of defect removal. The same black hood may need a light finishing polish after careful washing, while a neglected truck hood may require multiple stages. Even within one vehicle, the roof, horizontal surfaces, doors, and repainted panels can have different hardness, thickness, and defect patterns.
What the customer can reasonably expect
The useful question is not “Can every scratch disappear?” It is “Which defects can be safely reduced, and what level of improvement is justified by the vehicle’s use?” A leased crossover may benefit from a restrained enhancement. A show-oriented sports car may justify more inspection and refinement. A fleet van may need consistent appearance and quick turnaround rather than maximum correction on every panel.
Correction can make paint look deeper, cleaner, and more uniform, but it does not repair dents, replace missing paint, rebuild rusted metal, or restore a clear coat that is already peeling. It also cannot guarantee a defect-free finish after the vehicle returns to automatic brushes, abrasive towels, or unprotected winter grime.
Why Paint Defects Appear—and Why Gloss Disappears
Most visible defects are optical problems created by surface geometry. A circular wash mark is usually a collection of fine scratches arranged in arcs. Each scratch interrupts the smooth path of reflected light. Under a point light or direct sun, thousands of small interruptions appear as a hazy web even though the panel may feel smooth to the touch.
Other defects have different mechanisms. Road film can bond to the surface. Tree sap and bird residue can chemically attack or stain the finish if left in place. Hard-water minerals can dry into rings or spots. Oxidation changes the appearance of older exposed paint, especially where the protective top layer has deteriorated. In northern climates, abrasive winter contamination and hurried washing can compound all of these problems.
Vehicle manufacturers commonly warn owners to remove contaminants such as bird droppings, insects, and tree sap promptly because prolonged contact can damage painted surfaces. Ford’s owner-support portal provides model-specific care and maintenance information at Ford Owner Manuals; the exact cleaning instructions should always take priority for a particular vehicle, wrap, matte finish, or repaired panel.
Surface contamination can imitate paint damage
A rough-feeling hood is not automatically a scratched hood. Industrial fallout, rail dust, overspray, tar, and embedded road film can make a clean-looking panel feel like sandpaper. If a machine is used before those contaminants are removed, the pad can drag contamination across the finish and create additional marring.
That is why a professional process separates decontamination from correction. Washing removes loose soil. Chemical or mechanical decontamination addresses bonded material. Only then can inspection reveal whether the remaining marks are in the clear coat, beneath it, or simply residue sitting on top.
- Rough but visually clear: investigate bonded contamination before selecting an abrasive.
- Glossy but covered with circular haze: a test section may show whether a mild finishing system is sufficient.
- White or gray oxidation: determine whether the surface is recoverable or whether the coating is failing.
- Sharp, color-changing scratch: assume greater depth until inspection proves otherwise.
- Dark water rings: distinguish mineral deposits from etching before polishing.
Why black paint exposes every mistake
Dark colors do not necessarily have worse paint; they reveal contrast more readily. A fine scratch scatters bright light against a dark background, so black, navy, and deep red vehicles often look worse under inspection lighting. White and silver vehicles can hide micro-marring while still showing oxidation, staining, and uneven gloss.
This affects expectations for owners of performance cars, motorcycles, and powersports equipment. A fuel tank, fairing, ATV panel, or helmet may have a small painted area but a high-contrast finish. On a large RV, bus, or commercial vehicle, the defect may be less visually dramatic from standing distance but still noticeable along long reflections.
How the Correction Process Works
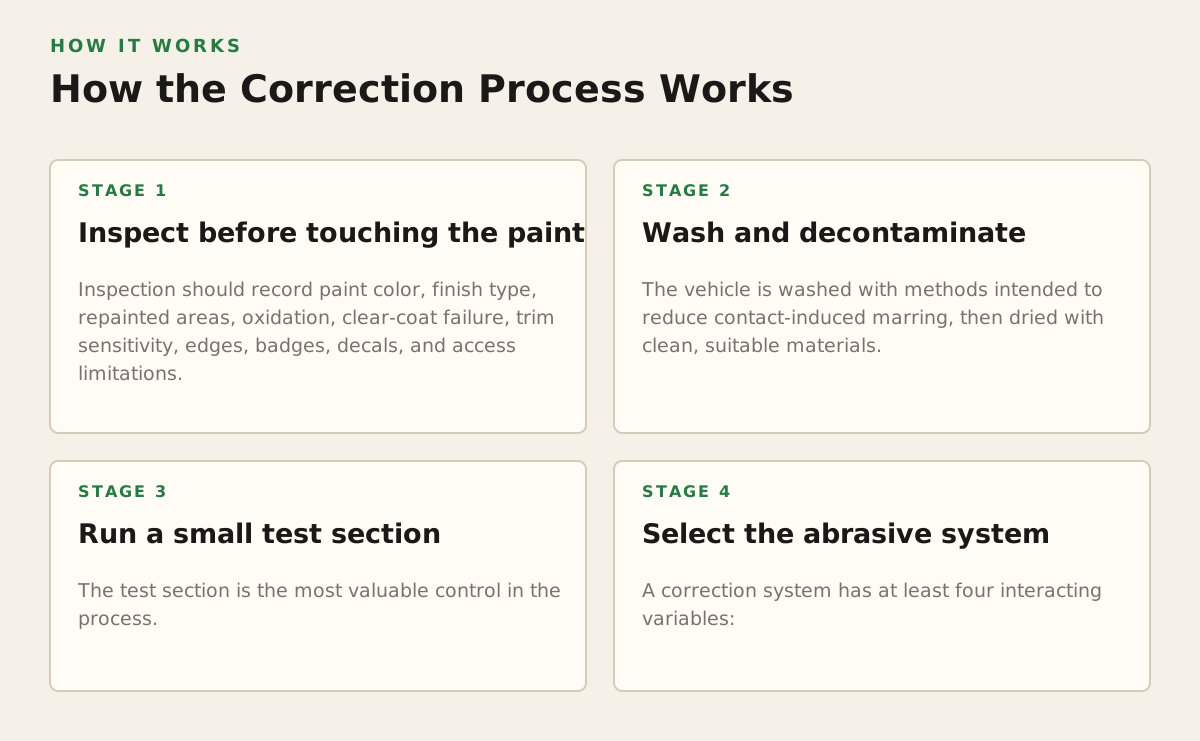
A reliable process is a sequence of decisions. The machine, pad, and compound are only tools within that sequence. Product makers such as 3M publish automotive aftermarket information covering abrasive, polishing, and paint-finishing products through their automotive aftermarket resources. The important practitioner lesson is to match the system to the defect and verify the result rather than assuming that a more aggressive product is automatically better.
1. Inspect before touching the paint
Inspection should record paint color, finish type, repainted areas, oxidation, clear-coat failure, trim sensitivity, edges, badges, decals, and access limitations. Direct sunlight is useful, but controlled lighting can reveal defects that broad daylight washes out. A paint-depth gauge may provide additional information, but a reading is not a universal permission to remove material; it may include primer, color, clear coat, body filler, or a previous repair.
For a dealership or fleet, inspection also creates a practical decision record: which panels need correction, which only need cleaning, and which should be referred for body or refinish work. That prevents a delivery vehicle from receiving unnecessary aggressive polishing simply because every unit was placed on the same package.
2. Wash and decontaminate
The vehicle is washed with methods intended to reduce contact-induced marring, then dried with clean, suitable materials. Tar, fallout, sap, and other bonded material are addressed according to the surface and product instructions. Emblems, seams, roof accessories, bed rails, motorcycle controls, and boat hardware require extra care because residue can collect where a polishing pad cannot safely travel.
For boats and personal watercraft, the technician must also account for non-automotive substrates, gelcoat, decals, hardware, and marine contamination. RVs and buses introduce height, access, and panel-size issues. A process that works on a fender does not automatically scale safely to a fiberglass cap or a large commercial side panel.
3. Run a small test section
The test section is the most valuable control in the process. A small area receives the least aggressive system likely to work. The technician then inspects the result for defect reduction, gloss, haze, edge behavior, and wipe-off. If it is insufficient, the next variable can be changed deliberately: pad, compound, machine action, number of passes, or working time.
Starting mild protects the finish and makes the trade-off visible. Consider an illustrative example: a black SUV has moderate wash marring but sound clear coat. A finishing polish may improve clarity without the extra removal associated with a heavy compound. A neglected work truck with deeper linear scratches may need a more assertive first stage on selected panels, followed by refinement. These are process examples, not universal prescriptions.
4. Select the abrasive system
A correction system has at least four interacting variables:
- Abrasive strength: how much cutting or refining action the product can provide.
- Pad construction: how the pad transfers movement and abrasive action to the surface.
- Machine movement: rotary and dual-action machines behave differently and demand different control.
- Technique: pressure, speed, arm movement, working area, and cleaning between sections.
More cut can remove defects faster, but it can also leave haze, create its own micro-marring, increase heat, or consume clear coat without producing a worthwhile visual gain. A soft finishing pad may create excellent clarity but be unable to level deeper marks. There is no honest universal combination for every paint system.
5. Refine and inspect
After a cutting stage, a refining stage may be needed to remove haze or pad marks and improve reflection clarity. The panel is wiped carefully and checked from multiple angles. Inspection should include direct light, oblique light, and normal viewing distance. A finish that looks perfect from one angle may show a remaining defect from another.
Residue can also make a panel appear more corrected than it is. A responsible process uses appropriate panel inspection and does not confuse a temporarily oily appearance with permanent defect removal. This is particularly important before installing a coating or film, because leftover residue can interfere with preparation and adhesion.
6. Protect the corrected surface
Correction changes appearance; protection determines how the surface will be maintained afterward. Depending on the vehicle and use, options may include a sealant, wax, ceramic coating, or paint protection film. A coating can make routine cleaning easier when properly prepared and maintained, but it is not a force field against rock impact or careless washing. Film is better suited to selected impact zones because it places a sacrificial layer over vulnerable paint.
Rite-Way’s ppf may be considered for high-exposure areas such as leading edges, rocker panels, luggage-loading zones, or motorcycle and powersports surfaces. The right protection depends on whether the primary threat is wash marring, chemical contamination, UV exposure, gravel impact, or operational wear.
Where Paint Correction Breaks Down
Correction is limited by paint condition, defect depth, access, and the owner’s maintenance habits. Promising complete removal without seeing the vehicle is poor practice. A qualified recommendation should identify what is likely to improve, what may remain visible, and what work should not be attempted.
Defects that are usually beyond safe polishing
- Exposed primer or metal: polishing cannot replace missing color and clear coat.
- Peeling or delaminating clear coat: abrasion can worsen the failure; refinishing is generally the relevant repair path.
- Deep scratches with sharp edges: these may extend through the clear coat into the color layer.
- Rust bubbles and perforation: the underlying corrosion must be repaired rather than cosmetically polished.
- Cracked, heavily weathered fiberglass or gelcoat: the substrate and finish system require specialized assessment.
A simple fingernail test can suggest that a scratch is substantial, but it does not measure depth and should not be treated as a pass-or-fail diagnostic. The safest decision comes from visual inspection, surface history, and conservative testing. Repaired panels may have different hardness or thickness from factory panels, so a uniform machine setting across the whole vehicle is especially risky.
Heat, edges, trim, and access
Machines generate friction and heat. Thin edges, sharp body lines, raised styling creases, and tight contours have less paint available for error and less area to dissipate heat. Rubber, textured plastic, matte trim, decals, and porous surfaces can stain or collect residue. Masking and slower hand work may be appropriate, but masking is not a substitute for control.
Large vehicles add a separate set of constraints. A box truck or bus can have broad, flat panels that expose uneven arm speed and inconsistent overlap. An RV may combine painted aluminum, fiberglass, graphics, sealants, and aged trim. A semi-truck can have polished metal, painted cab panels, steps, tanks, and operational grime in close proximity. The process must be planned by material and access—not just by vehicle name.
Perfection can be the wrong target
Maximum correction is not always the best ownership decision. A daily driver used on Detroit-area roads may acquire new marks quickly. Removing every visible defect from an older vehicle could require disproportionate time and clear-coat removal for a short-lived visual gain. For a fleet, consistent presentation, repeatable maintenance, and downtime control may matter more than chasing isolated defects on every panel.
An illustrative starting policy might be to prioritize the hood, roof, trunk, driver-side doors, and other high-visibility panels, then leave stable deep scratches alone if reducing them would require excessive abrasion. That is a planning example, not a universal percentage or guaranteed result. The correct stopping point is where additional correction creates more risk or cost than visual value.
How Practitioners Apply It to Different Vehicles
The best correction plan follows the vehicle’s job, not merely its paint color. A personal SUV, a collector car, a fishing boat, and a delivery fleet can all need cleaner reflections, but their contamination, storage, access, and maintenance patterns differ.
Daily drivers, trucks, and SUVs
For a commuter or family SUV, the most useful package often combines decontamination, measured enhancement, and a protection choice that the owner can maintain. Door handles, liftgate sills, door edges, and lower panels deserve attention because they receive repeated contact. Trucks may need separate planning for bed rails, tailgates, toolboxes, running boards, and work-site residue.
If the owner uses a tunnel wash, parks outdoors, or regularly drives salted roads, a moderate correction followed by durable protection may be more sensible than a highly aggressive finish that demands careful hand washing. The maintenance conversation should include drying technique, bird-dropping removal, winter washing, and what products are compatible with the selected protection.
Sports cars, motorcycles, and powersports
Sports-car owners tend to notice reflection defects on long, curved panels and dark colors. Motorcycles and dirt bikes have smaller painted areas but more complex access: tanks, fairings, number plates, fenders, swingarm areas, and tight edges. ATV and powersports plastics may not behave like automotive clear coat, so the technician must identify whether a part is painted, molded, textured, or wrapped.
On a motorcycle, tank protection may be more valuable than correcting a hidden frame-adjacent panel because clothing, zippers, and repeated contact create fresh wear. On a dirt bike, operational mud and pressure washing can outweigh the benefit of chasing fine defects. The recommendation should protect the parts that actually receive abuse.
Boats and personal watercraft
Boat owners should distinguish automotive paint from gelcoat and account for oxidation, mineral deposits, salt, dock contact, hardware, graphics, and trailer use. A faded topside may require a different process from a painted accent panel. Waterline staining and exhaust residue also need to be removed without damaging adjacent decals or fittings.
Correction can improve gloss, but storage and use determine how long that improvement remains visible. A boat kept in the water, a jet ski trailered weekly, and a craft stored indoors do not face identical exposure. Protection should be selected with the surface material and cleaning schedule in mind.
RVs, buses, semis, dealerships, and fleets
Commercial appearance programs need repeatability. Before scheduling a large group of vehicles, establish an inspection classification such as:
- Class A: wash, decontamination, and protection only.
- Class B: one-step gloss enhancement for general presentation.
- Class C: targeted multi-step correction on high-visibility panels.
- Class D: body or refinish referral because polishing is unsuitable.
This classification is an illustrative workflow, not a promise of identical labor or results. It helps a fleet manager separate cosmetic refinement from repair work and decide where downtime produces a business benefit. Dealerships can use the same logic for trade-ins and delivery units: correct the defects that influence presentation, avoid unnecessary removal on sound paint, and document panels that need body-shop attention.
RVs and buses require safe access planning, weather considerations, compatible products for graphics, and a clear boundary between paint correction and oxidation restoration. A semi-truck may require staging around tanks, mirrors, steps, and cab hardware. Large-panel consistency is often more important than chasing every isolated scratch.
A practical decision sequence for owners
- Identify the objective: resale presentation, personal enjoyment, easier maintenance, fleet consistency, or impact protection.
- Document the surface: photograph defects and note repaints, wraps, decals, peeling areas, and corrosion.
- Choose the least aggressive viable process: begin with a test section rather than a vehicle-wide assumption.
- Set a stopping point: decide which defects can remain when further removal would create unnecessary risk.
- Match protection to exposure: select a sealant, coating, or film based on washing, parking, gravel, chemicals, and contact.
- Plan maintenance before delivery: a correction is easier to preserve when the washing and drying method is clear.
For Greater Metro Detroit vehicles, the most defensible recommendation is usually a condition-based inspection followed by a documented test section. Ask for a distinction between removable contamination, correctable clear-coat defects, and damage that needs refinishing. Then choose a correction level that fits how the vehicle is driven, stored, washed, and expected to look—not an abstract promise of perfection.
Rite-Way Auto Reconditioning works with personal vehicles, dealerships, fleets, boats, RVs, motorcycles, powersports equipment, buses, and commercial vehicles; visit Rite-Way Auto Reconditioning to discuss an inspection and a protection plan suited to the surface and its real use.
Want it done for you? See our paint correction service at our Romeo shop, or call (586) 651-4007.