
Paint protection film for motorcycles is a clear or satin polyurethane film installed over vulnerable painted and finished surfaces to reduce damage from gravel, road grit, insects, boot rub, and light abrasion. For a Detroit-area motorcycle, the practical approach is to protect the front-facing panels and high-contact areas first, then choose full or partial coverage according to the bike’s shape, finish, storage, and riding conditions. It is not armor: sharp impacts, crashes, deep scratches, neglected edges, and contaminated surfaces can still damage the film or the paint beneath it.
What motorcycle paint protection film actually is
Paint protection film, commonly called PPF, is a flexible protective layer bonded to a prepared vehicle surface. It is different from a wax or ceramic coating. A wax or coating can make cleaning easier and change the surface’s water behavior, but neither creates the same physical barrier as a film layer. PPF is selected when the owner wants sacrificial material between the painted finish and common contact.
Motorcycle applications are more complicated than placing a large rectangle on a car hood. A motorcycle may have a curved fuel tank, compound bodywork, sharp styling transitions, textured trim, exposed fasteners, emblems, vents, and panels that flex or vibrate. The installer must decide where film can conform securely and where an edge, seam, or mechanical movement would make it a poor candidate.
Clear, satin, and pre-cut options
Clear film preserves the existing appearance when the goal is discreet protection. Satin or matte film can alter gloss and may be chosen to create a uniform low-sheen appearance, but it should not be installed over only one portion of a visibly continuous panel unless the transition is intentional. Official product information from [XPEL describes its paint protection film](https://www.xpel.com/products/paint-protection-film/ultimate-plus) as a polyurethane film product designed for automotive surface protection; motorcycle suitability still depends on the specific panel, product instructions, and installation quality.
Pre-cut patterns reduce knife work on the motorcycle, while custom-cut film can address unusual fairings, older bikes, luggage, or modified bodywork. A pattern is not automatically correct simply because it exists. Model year, market, accessories, replacement panels, and color changes can affect alignment. The installer should inspect the actual motorcycle before promising coverage.
What the film can and cannot cover
A useful scope divides a motorcycle into three groups:
- Good candidates: painted tank panels, front fairings, leading edges, side panels exposed to boot contact, and painted luggage lids.
- Conditional candidates: tightly curved nose pieces, textured plastics, removable trim, graphics, tank pads, and panels with very little edge access.
- Poor candidates: hot exhaust components, moving joints, rubber seals, porous unfinished surfaces, heavily oxidized paint, and areas that cannot be cleaned or safely accessed.
That division matters because “full coverage” can mean full coverage of the painted bodywork, not every visible component on the motorcycle. A responsible estimate identifies the panels, finish, edge treatment, and exclusions in writing.
Why riders choose PPF for motorcycles
A motorcycle exposes its finish differently from a car. The front of the bike meets insects and airborne grit, while the tank and side panels encounter zippers, buckles, gloves, belts, knees, and boots. Transport straps, tank bags, magnetic accessories, and careless fueling can create their own contact points. In southeastern Michigan, spring road debris, construction zones, and winter storage handling add reasons to protect high-value paint before the first avoidable mark appears.
Impact and abrasion are separate problems
Impact protection addresses concentrated strikes, such as a small stone hitting a front-facing panel. Abrasion protection addresses repeated rubbing, such as a jacket zipper touching the tank at every stop. A film may reduce the visible consequence of both, but the installation plan should identify which problem is being solved.
For example, a touring rider who uses a tank bag may need a broad tank-area installation with careful attention to the bag’s contact points. A sport-bike owner who rides behind traffic may prioritize the front fairing, front fender, and lower leading edges. An adventure-bike owner may care more about side-panel contact from riding gear and luggage than about achieving a visually invisible installation across every irregular surface.
Film can also preserve the original finish under areas that are difficult or expensive to repaint. That does not make repainting impossible or guarantee resale value. It simply changes the surface that receives ordinary wear. If the film is later removed, the underlying paint may look better than an unprotected neighboring area, provided the substrate and adhesive remained suitable and removal was performed correctly.
Where coatings still fit
PPF and a ceramic coating are not mutually exclusive. A film can provide the physical sacrificial layer, while a compatible coating may be used on the film or on adjacent painted surfaces if the product manufacturer permits that combination. Do not assume every coating bonds or performs correctly on every film. The installer should follow the film and coating manufacturer’s preparation and cure instructions rather than treating the combination as universal.
For owners comparing services, ask whether the recommendation is meant to solve stone impact, cosmetic gloss, cleaning effort, or repeated contact. If the main concern is water spotting and routine washing, a coating may be sufficient for some surfaces. If the concern is a recurring zipper mark or gravel strike, a physical film barrier is usually the more direct solution.
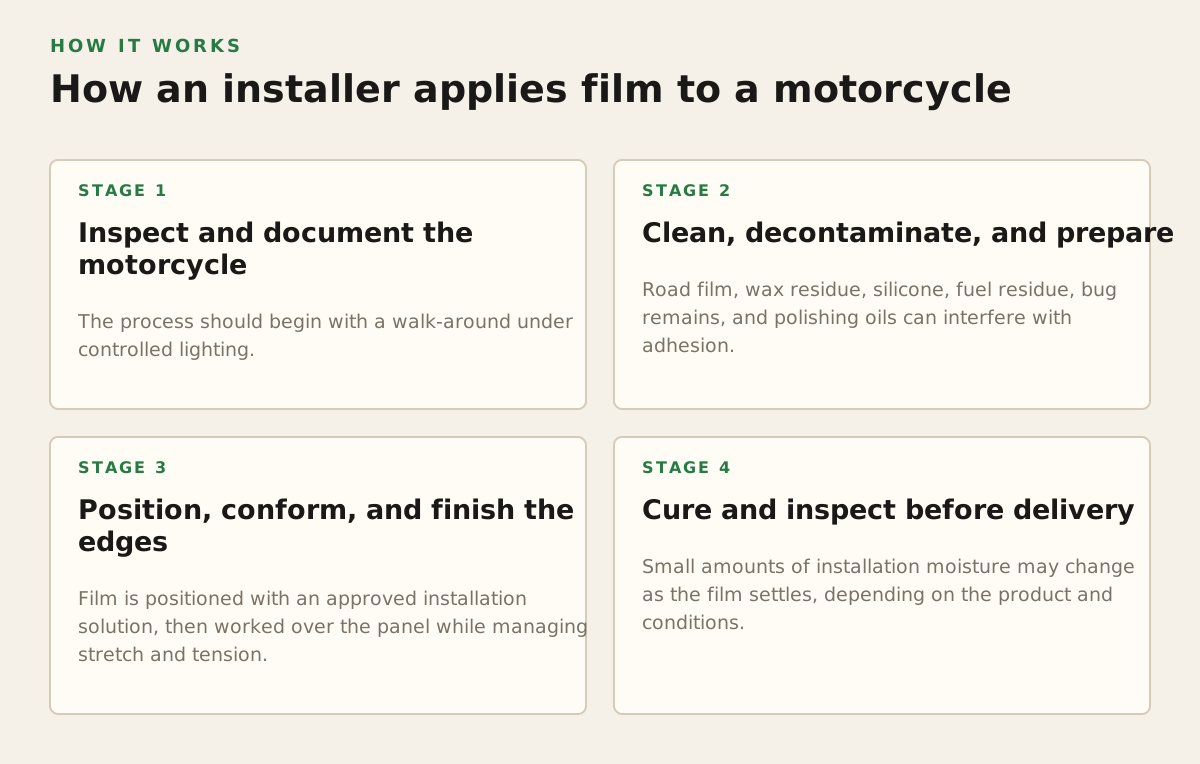
How an installer applies film to a motorcycle
A durable result depends less on the word “self-healing” in a brochure and more on substrate condition, pattern choice, edge design, and installation discipline. In 2026, product families differ in thickness, finish, adhesive behavior, warranty terms, and care requirements. For example, [3M’s official vehicle protection film information](https://www.3m.com/3M/en_US/p/d/b5005118007/) describes film intended for vehicle surface protection, but the product page should not be read as approval for every motorcycle panel or every installation method.
1. Inspect and document the motorcycle
The process should begin with a walk-around under controlled lighting. Existing chips, touch-up paint, sanding marks, oxidation, repainted panels, loose decals, and unstable clear coat affect what can be safely covered. Photographing defects before work prevents confusion about whether a mark was present before installation.
Film does not erase defects beneath it. A chip or scratch may remain visible after installation, and lifting unstable paint during future removal is a substrate risk. On a used motorcycle, paint correction or minor touch-up may be discussed first, but correction should not remove more clear coat than the panel can safely tolerate.
2. Clean, decontaminate, and prepare
Road film, wax residue, silicone, fuel residue, bug remains, and polishing oils can interfere with adhesion. The preparation method should suit the paint, decals, and plastics. Fuel tanks deserve particular caution: spills should be cleaned promptly, and the owner should disclose any aftermarket tank pads or coatings.
Motorcycle geometry creates small contamination traps around badges, seams, fasteners, and panel joints. If the installer cannot reach or clean a perimeter, the planned film edge may not remain reliable there. Removing a panel may improve access, but it can also introduce fastener, alignment, or electrical risks. The correct choice depends on the motorcycle and the agreed scope.
3. Position, conform, and finish the edges
Film is positioned with an approved installation solution, then worked over the panel while managing stretch and tension. Excessive stretching can distort a pattern or place continuing stress on an edge. Heat may help conform the film, but heat is not a substitute for correct pattern sizing and clean technique.
Edges are the long-term weak points because dirt, pressure washing, fingernails, and repeated flexing can begin lifting. A good plan minimizes exposed edges in high-contact zones, avoids placing seams where a boot or bag will catch them, and allows necessary service access. Wrapping an edge can improve concealment, but only where the panel geometry and product instructions allow it.
4. Cure and inspect before delivery
Small amounts of installation moisture may change as the film settles, depending on the product and conditions. Delivery instructions should state when the motorcycle can be washed, exposed to rain, or fitted with accessories. The owner should receive a final inspection of seams, edges, bubbles, contamination, and panel alignment rather than being told simply to “let it dry.”
For dealerships and fleet operators, the same process should be documented by unit: vehicle identification, panels covered, pre-existing damage, film product, installation date, and care restrictions. A repeatable intake sheet is more useful than a vague promise of “front-end protection,” especially when motorcycles are sold, transported, or reassigned between locations.
Where motorcycle PPF breaks down
PPF reduces risk; it does not make painted parts indestructible. A direct crash, deep gouge, vandalism, fuel damage, or impact from a large object can cut through the film. The film may absorb or hide the first signs of wear until it is inspected closely, so owners should still check edges and high-contact areas during routine washing.
Surface, temperature, and chemical limitations
Bad substrate conditions can defeat good film. Peeling clear coat, chalking paint, poorly cured refinishing, and loose graphics are not stable foundations. Film installed over them may lift the defect, trap contamination, or complicate later repair. A professional may recommend correction, refinish work, or no film on that panel.
Heat and chemicals require judgment. Exhaust systems, engine-adjacent surfaces, and areas repeatedly exposed to fuel or aggressive solvents are not automatically appropriate. The owner’s maintenance habits matter too. A motorcycle that is wiped with a dirty towel after every ride has a different risk profile from one washed with dedicated supplies and stored indoors.
The [National Highway Traffic Safety Administration’s motorcycle safety guidance](https://www.nhtsa.gov/road-safety/motorcycles) focuses on riding safety rather than cosmetic protection, but its central point is relevant to scope: motorcycle use exposes the rider and machine to conditions that differ from passenger vehicles. PPF should be treated as a finish-protection measure, never as protective riding equipment or structural safety gear.
Common installation and ownership mistakes
- Covering damaged paint without disclosure: the defect remains and may become harder to evaluate later.
- Choosing the cheapest partial kit by default: an uncovered adjacent edge may receive the same boot, bag, or gravel contact.
- Installing under a dirty accessory: grit trapped beneath a tank bag or pad can abrade the film.
- Using a pressure washer at an edge: concentrated water can encourage lifting, especially on a fresh installation.
- Assuming film is maintenance-free: contamination still needs safe, prompt removal.
These are not arguments against PPF. They are reasons to match the material and coverage to the motorcycle’s actual use instead of buying a generic promise of “complete protection.”
How to choose coverage for your motorcycle
Start with the motorcycle’s exposure pattern, not with the largest package name. A rider who commutes daily behind trucks may prioritize the front fairing and fender. A rider who tours with luggage may need tank and side-panel coverage. A collector stored indoors may value discreet preservation of original paint and a reversible appearance over maximum practical coverage.
A practical coverage decision
- Mark contact points: identify where a tank bag, riding gear, boots, straps, or luggage touches the finish.
- Mark impact zones: identify front-facing panels and lower edges that meet road debris.
- Separate painted from unpainted parts: do not pay for “full coverage” without knowing which materials are actually included.
- Inspect panel condition: decide whether correction, touch-up, refinishing, or cleaning must come first.
- Choose a finish: clear preserves gloss; satin changes the appearance and should be planned across visually connected areas.
- Confirm care and removal: ask what washing, accessory, fuel, and storage practices could shorten the installation’s life.
For a simple illustrative starting policy, an owner might protect the tank contact zone and front-facing painted panels first, observe wear through one riding season, and expand coverage during the next service visit. That is a planning example, not a universal threshold. A high-mileage commuter, a track rider, and a weekend collector can rationally choose different coverage.
Ask the installer these concrete questions before approving work:
- Which exact panels are included, and which are excluded?
- Will the film stop at the edge, wrap the edge, or use a visible seam?
- How will existing chips, repainting, decals, and textured plastics be handled?
- Is the pattern pre-cut, custom-cut, or a combination?
- What should be avoided during the initial cure period?
- How should the film be cleaned after fuel, insects, salt, or road grime contact?
Care, inspection, and a sensible recommendation
Routine care is straightforward but not optional. Rinse loose grit before wiping, use a clean microfiber towel and a product approved for the film, and remove insects or fuel residue without aggressive scrubbing. Do not pick at a lifted edge or use a sharp tool to chase a bubble. Photograph a change and contact the installer while the condition is easy to evaluate.
Inspect the film whenever you wash the motorcycle. Look at the leading edges, tank contact area, seams, panel corners, and places where accessories touch. A small edge issue can often be assessed more easily than a large section that has collected dirt underneath. If the motorcycle is stored for winter, clean and dry it before covering it; trapped moisture and contamination are poor neighbors for any finish.
For Detroit-area owners, the best recommendation is usually targeted coverage based on the bike’s actual use rather than automatic full-body installation. Riders exposed to gravel, daily traffic, tank-bag abrasion, or frequent transport should prioritize the surfaces that receive those forces. Collectors and lightly used motorcycles may choose a more limited, appearance-focused plan. In every case, confirm panel condition, finish, edges, aftercare, and exclusions before work begins.
Rite-Way Auto Reconditioning serves motorcycles and other powersports vehicles alongside cars, trucks, boats, RVs, fleets, and commercial vehicles; review its ppf service information and contact Rite-Way Auto Reconditioning to discuss a motorcycle-specific inspection and coverage plan.
Want it done for you? See our powersports detailing service at our Romeo shop, or call (586) 651-4007.